
Building an SVG Circle of Fifths
Wednesday, April 5th, 2023
Contents
- Introduction
- The Circle of Fifths
- Understanding SVG
- Basic Rendering
- Understanding the SVG Segment Functions
- Rendering the Wedges in React
- Positioning the Circle of Fifths Text
- Closing Thoughts
Introduction
About a week ago, I decided to sit down and do a little coding on an old idea/project of mine. And, because I just can't help myself, what could have been a simple and fun little project escalated into a whole thing, and I found myself deep down the rabbit hole of SVG, with my brain boggling at sines and cosines, and a creeping sense that I had bitten off more than I wanted to chew. Fortunately, this is a feeling I've gotten good at ignoring, and I wound up with a pretty cool React component at the end of the day.
This article will describe the process of building out the initial structure of this component. We'll spend most of our time today diving into how SVG works, and how we can use it to create designs that wouldn't be possible in plain HTML. Let's get started!
Right from the start, I decide that I'd like to do this with React and Typescript. I've been working in this stack for my day job recently, so I'm decently up to speed with the current hotness. The music theory dashboard app shouldn't need to rely on any kind of backend service, and this stack should get us up and running quick. Also, we'll be able to use the excellent Tonal music theory library to save some time.
So, I pop open the ol' editor, and because I'm cool, I unironically start with just an HTML file. I know about Parcel, so I would never do anything as déclassé as to use Create React App - nope, I'll just make little tiny projects in subdirectories and link to them. I have a languishing domain that I'd like to use for this, and sticking with a static site will mean I can use Netlify to deploy easily. Eventually, maybe I'll throw together some other music related tools that can live at the same domain.
I quickly throw together a little template app that has all the tools I want to use - in this case, React, with Typescript, using Tailwind for styling, and Parcel for building/packaging. If that's not a totally hip bleeding edge stack I don't know what is. This is pretty straightforward - Parcel makes most of this incredibly easy. If you'd like to see or use that template, I pushed it to its own repo here. Now we're ready to roll.
Just like the last time I built this, I want to be able to pick a tonic (the root note of a musical key), select whether I want the major or minor version of the key, and display a bunch of information. I'd like to show the diatonic chords and secondary dominants of the key, just like I did in the previous iteration. So, I start writing the HTML for a little drop down menu like I had before.
And then, the "it would be cool if" curse strikes, and I think "what if I had a sweet svg circle of fifths to use as a key picker?" And with that seemingly innocuous thought, I have sealed my fate and decided that this project is going to be way bigger than I thought.
The Circle of Fifths
Understanding SVG
So, here I am, with a fresh project up and running, displaying nothing but a nice little "hello world" div. Up until now, my experience with SVG has pretty much been limited to downloading icons from FontAwesome and using them in my sites. I have definitely never hand written an SVG, and also, I'm working in React, so I have very little idea of what to do. I do know a couple of things up front, which make me think that SVG is the right choice for what I want to do:
- SVGs are scalable (it's right there in the name). This means that this component should be easy to make responsive.
- SVGs are composed of a tree of elements, just like regular old HTML. They can be assigned click listeners, classes, and styles, just like other HTML elements. This means it should be easy to make this component interactive.
- SVGs give designers much tighter control over layout and allow them to draw arbitrary shapes. This means I should be able to design an interestingly shaped component like the Circle of Fifths in a way that would be impossible or very annoying with standard HTML elements.
So now what? Well, like any dev who's trying something they've never done before, I Google around for a bit to see if this is a crazy idea. A random Reddit says “nah it's cool, you can put your SVG right in your JSX and it's all gravy.” And even ChatGPT seems to agree that React and SVG go together well. I'm already thinking "ok, this is cool, I'm gonna make a totally sick circle of fifths component, it's gonna have a million users and someday I'll get a call from like Ableton or someone, and they'll say hey you utter badass, can we please pay you millions to make sweet music software for us?"
... Meanwhile, back in reality, I’ve typed <svg> in my component, and I have used my massive intellect to divine that SVGs have a <circle> element too, so I have written the following code:
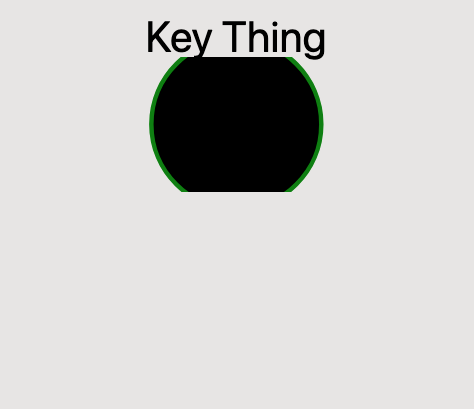
This is going to be harder than I thought.
Basic Rendering
Obviously, this looks worse than garbage. But let's pause for a bit of optimism here. This is the first sample of code in this article, but that's because I've glossed over a bunch of setup that it took to get to this point. Yes, our app looks awful right now, and if I were a pessimist, I might give up here. But we've got a (very) basic skeleton of our application already, and despite its ugliness, this is actual progress - because now that we have something concrete, we can actually start solving problems. Up until now, the Circle of Fifths has just been a thought floating around in my head, but now we have something to iterate on. I think it's really important to try to get something on the page as soon as possible, because as soon as you do, you can start identifying problems that need solving and make progress.
Just by looking at what we have so far, I can tell there are a few different issues that need my attention:
- There's something I don't know about how color works in SVG. I didn't set a fill color, so why is the circle black in the middle?
- I'm not sure how I'm going to create the divisions I need in my circle.
- Clearly, I don't understand how sizing / responsiveness works on SVG. I assumed that using percentage based parameters for my circle would make it scale to the size of the element, but that doesn't seem to be the case.
- While I don't know much about SVG in particular, and even less about math, I have a sense that trying to do this with percentages isn't going to work. If I'm going to position elements around a circle, I'm going to need more precision. But at this juncture, I don't know how to do that without setting a fixed size on my SVG. I don't want to do that, since I want the element to be responsive.
Now that I have a sense of a few burning questions, I drop back into research mode, and seek out the information I need to make another step forward. I find two really useful links in this process:
- The MDN SVG Tutorials
- This article from LogRocket about making the Circle of Fifths with SVG (Hey! That's what I want to do!)
The The MDN SVG Tutorials are full of great information. I highly recommend reading through these if you're planning to do anything with SVG. After reading through them, I have a much better sense of how SVG works, and some of the different elements that I can display. I also get answers to several of the questions above - most importantly, how responsiveness works when it comes to SVG. SVG elements have an optional viewBox parameter, which defines the size in "pixels" of the image (it's actually not pixels exactly, but that's a good enough abstraction for this purpose). Setting the width and height attributes on the <svg> element then scales the resulting image to whatever size you want in the final rendering. (You can learn more about this in the Positions section of the MDN tutorials). With this in mind, I now know I can set a fixed size on the SVG and use that fixed size to do all the positioning math. Then we can scale that SVG to different sizes to keep our component responsive.
The Circle of Fifths article from LogRocket is even better - it links to some helpful math functions and outlines a general method for rendering the Circle of Fifths. Armed with these two pieces of knowledge, I go back to the code, and change the setup of the SVG to incorporate a viewBox. I also steal the segment function and the supporting math functions from the LogRocket article, and make an attempt at displaying them in the circle.
Here's the result:
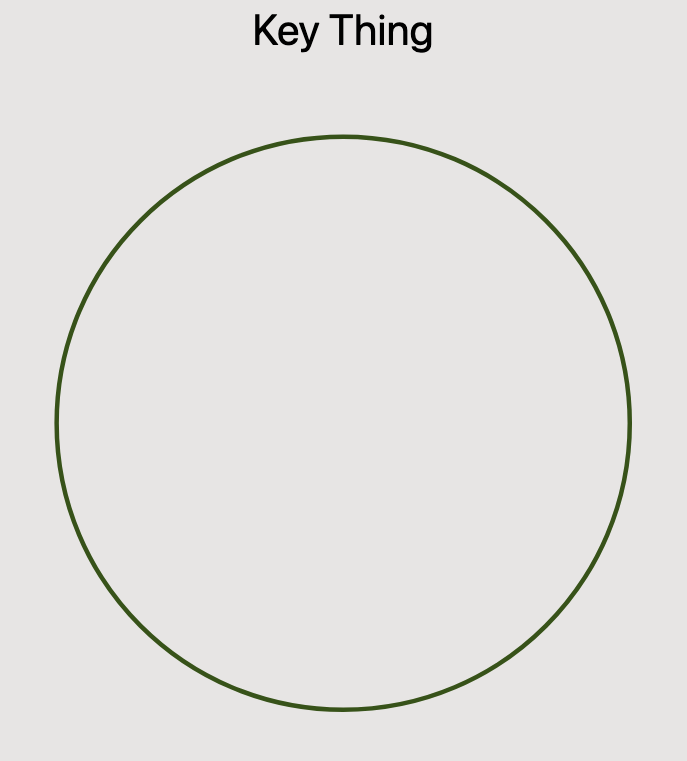
Already, much nicer than what we had before! The circle is actually fully visible, we used fill="transparent" to eliminate the default black fill, and it fills a nice portion of the viewport via scaling. However, the code from the LogRocket article doesn't seem to have worked - while my artisanally hand-written circle is displaying fine, none of the segments have rendered. Time to dig into the code we've blindly copy-pasted, and figure out what's going on. (Turns out, understanding the code you want to use is a good idea!)
Understanding the SVG Segment Functions
So, looking at the code we've pasted in, we've got three different functions. We need to take a deeper look at each of these, and come to an understanding of what they do. Those three functions are:
- polarToCartesian (written by Håken Lid)
- segmentPath (also written by Håken Lid)
- segment (written by Mads Stoumann)
We'll start at the top level, and then keep digging until we know what's going on.
The segment function is as follows:
This just pre-calculates the parameters to be sent into the segmentPath function, and I ultimately wound up writing my own version of this, but it's still helpful to understand what's going on here. This function calculates:
center- the origin of the circle, calculated by halving the size of the SVG to center it.degrees- the arc measure of the segment, in degrees. For our purposes, this will always be 30 degrees, since there are 12 notes in the Circle of Fifths (360/12 = 30)start- the degree point on the circle where the segment will begin. This is calculated by multiplying the index of the current segment by the arc measure of each segment.end- the degree point on the circle where the segment will end. This is calculated by multiplying the index + 1 of the current segment by the arc measure of each segment.path- the SVG path resulting from our call to segmentPath, which will be used as thedparameter of our SVGpathelement.
<path> element as a string.
Next, let's quickly look at the polarToCartesian function, because it's important to understanding what pathSegment does. polarToCartesian does what it says on the tin - given a polar coordinate, it calculates the corresponding cartesian coordinate. I remember learning about polar coordinates in college Calculus, but for some reason I seem to have suppressed this memory. Some trauma-laden part of my psyche issues forth a mysterious urge to pour a triple whiskey. I ignore this, and take a quick trip to Wikipedia to refresh my memory.
A detailed discussion of polar coordinates is way outside the scope of this already over-long article, but at a high level, they are a way of specifying a point in a plane in reference to a circle. Given the origin point of the circle, an angle, and a distance from the center of the circle, we can determine the corresponding Cartesian (i.e. (x, y) ) coordinate. This allows us to plot the point in our SVG, which speaks Cartesian coordinates. We won't look into the code here - it does some stuff with sine and cosine to find the correct coordinate, and figuring out how it works is left as an exercise for the reader. Feel free to thank me for this opportunity to educate yourself.
Now that we understand that, we can make sense of what the segmentPath function does. The <path> SVG element is probably the most powerful element in SVG, and can be used to define a path of basically any imaginable shape. It takes a string called d that specifies the path in a special syntax. Let's take a look at the code of segmentPath and break it down.
Let's take a second to get a visual sense for what this function does. It creates a series of SVG path commands. Those commands form a rounded wedge shape, like this:
We've sort of already broken down the arguments of this function in our examination of the segment function, but as I was figuring everything out, I wrote this TSDoc block for the function, which explains each argument:
    * Generates an svg path for a segment of a circle
    *
    * @param x - x offset for the center of the circle
    * @param y - y offset for the center of the circle
    * @param r0 - outer radius of the segment, i.e. how far out it
    *             extends from the center of the circle
    * @param r1 - inner radius of the segment - i.e. how far out from
    *             the center it starts. if this were 0, the segment
    *             would come to a point touching the center.
    * @param d0 - where the segment starts in the circle - i.e. the
    *             degrees from reference of one edge
    * @param d1 - where the segment end in the circle - i.e. the degrees
    *             from reference of other edge
    */
The function looks gnarly, but it only has three statements. The first statement calculates the large-arc-flag parameter for our arc paths, and in our case this will always be 0 (our arcs never exceed 180 degrees of arc measure). The next statement just munges the given polar coordinates into the correct string format for our arc path.
The final statement is the most interesting. It constructs the d parameter for our <path> element by calculating a series of path drawing commands and concatenting them into one string. It may look scary, but it's actually pretty simple. The function calculates 4 points, which we can think of as the "corners" of our segment, and then draws lines between those points. These 4 points are given as polar coordinates, and converted to cartesian points on the SVG canvas by the polarToCartesian function.
Here's a new SVG, with each of those points labeled:
Now, let's take a closer look at the commands that generate this path. Here's the full set of commands, broken out onto individual lines:
    `M${point(r0, d0)}`,
    `A${r0},${r0},0,${arc},1,${point(r0, d1)}`,
    `L${point(r1, d1)}`,
    `A${r1},${r1},0,${arc},0,${point(r1, d0)}`,
    'Z',
Next, we'll go line-by-line through these commands. I've generated SVGs to serve as a visual aid for what's happening here - the current position of the cursor at each step is marked by the yellow circle:
M${point(r0, d0)}First, we use the M command, which moves the cursor to the starting point (r0, d0).
A${r0},${r0},0,${arc},
1,${point(r0, d1)}
Next, we use the A command to draw the outer arc, between the points (r0, d0) and (r0, d1).
L${point(r1, d1)}Then, we use the L command, to draw a straight line between (r0, d1) and (r1, d1).
A${r1},${r1},0,${arc},
0,${point(r1, d0)}
We use another A command to draw the inner arc, between the points (r1, d1) and (r1, d0).
ZFinally, we use the Z command, which tells SVG to close the path by drawing a line from the current cursor location to the start of the path.
Rendering the Wedges in React
OK, wow. That was a deep dive! But now, I fully understand the code I found online. In the process of ripping these few lines of code apart, we've learned a lot - we understand some math concepts that will be important as we continue to live in a circular world, and we also have a much better understanding of the mechanics of SVG paths. This knowledge is going to pay off in a big way as we move back into building our Circle of Fifths.
It turns out that the real reason our segments weren't rendering has nothing to do with SVG itself. Our problem is that we're returning our paths as raw strings, and JSX does not allow us to do this for HTML safety reasons. Remember, the segment function returns something like this:
So this code from our first shot at rendering the Circle of Fifths:
Is effectively trying to do this:
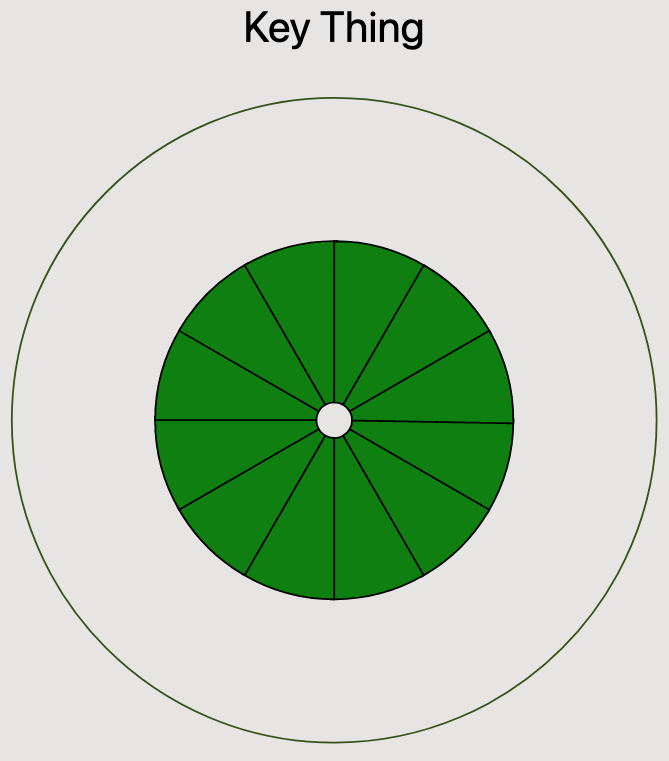
But that's no problem at all, because that's like... the whole point of React. Let's pull our path segments, which I have started to think of as "wedges", into their own component. I also change over to using actual pixel numbers for positioning the circle, since we're going to have to start thinking in real numbers to properly utilize our math functions. We get rid of the segment function in favor of our new component, and just call segmentPath as part of its definition. The CircleOfFifthsWedge component works very similarly to the segment function, taking a series of parameters as props and passing them down to segmentPath to generate the shape of the wedge.
This works beautifully, and all of a sudden, we've got ourselves a ... lime!
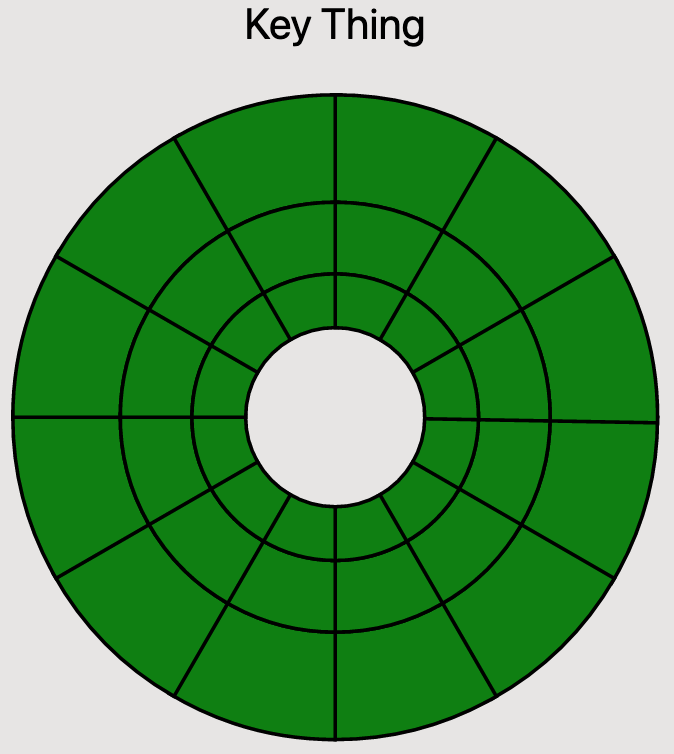
Now we're moving, armed with all the know-how we need to iterate quickly. The next thing I do is to add some more maps over our data array to render the different sections of the Circle of Fifths. This is pretty simple now that we know what we're doing. Rendering each of the three rings is basically the same, except that we choose different values for r0 and r1 to position and vary the size of each ring.
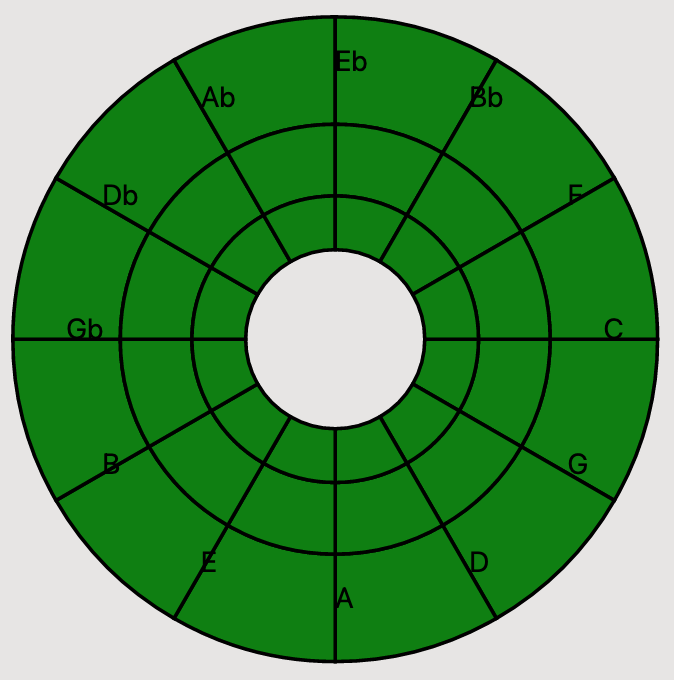
Alright, now we're getting somewhere! For the first time, we've got something that looks recognizably like the Circle of Fifths.
Positioning the Circle of Fifths Text
Now that we have our basic structure in place, we can start working on positioning our text. We're going to utilize a couple of key insights from the LogRocket article to do this. The first insight is that, as currently rendered, the edges of our wedges (heh) form the lines where we want to position our text. The next insight is that we can use a CSS transform to rotate the wedge segments so that the text we render is positioned in the middle.
We fill out an array of objects to define the data for the various positions in the Circle of Fifths:
Then, in our component, we use this data to render the text for the first ring of the Circle. We use our old buddy polarToCartesian to calculate where we want to place our text. We manually specify a radius that will place the text in the middle of the segment, and use the same logic as with our segments to calculate the degrees from reference of our coordinate.
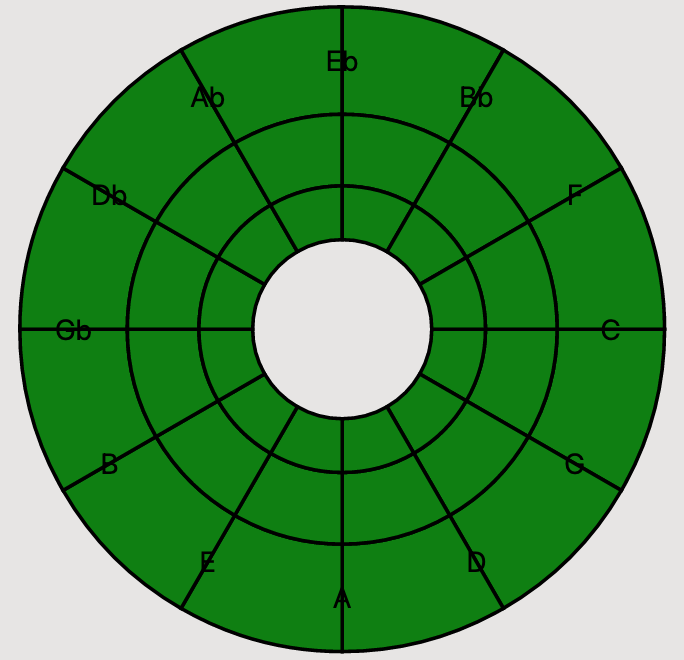
Alright, that looks close, but our text isn't centered on the lines we specified. Why?
This one took me some digging, but the reason is because by default, text is positioned by the top-left corner of its bounding box. What we really want is to position the text by the center point of its bounding box. I spent a little time screwing with bad options, but after some Googling around, realized that a simple CSS fix was all I needed. We can use the text-anchor and dominant-baseline CSS directives to position our text just right. We add them as inline styles to our text, and everything looks great!
Next, we just need to apply our transform to the wedges to rotate them correctly. We add a group element to enclose all the wedges, and then style it with a CSS Transform. We also pass a transformOrigin style property so that the rotation happens about the origin of our circle.
At this point, we're basically done. All there's left to do is to add the rest of our data into the circle. I also (finally) changed the fill color from that nasty default green, and re-ordered my data array to position the text in the usual Circle of Fifths way. Here's the final version of the component (well, for this article, anyway).

Here's the complete source of the main component:
Closing Thoughts
Well, that turned out to be a crazy long article. If you made it this far, thanks for sticking with me. I hope you found it worthwhile and educational!
As far as we've come, we're not done yet! While we've got a really nice looking Circle of Fifths, it can't do anything yet.
Before we go, let's take stock of what we've done, and what we still have left to do.
In today's "coding session," we:
- Learned about the Circle of Fifths
- Learned a ton about how SVG works, and even learned a little math!
- Adapted some code we found to our needs, and created a custom React component that displays the Circle of Fifths
- Laid out the data backing our component, and the text on the circle
- Saw a man descend into madness, all to avoid writing a single
<select>tag.
Here are some things that we still have left to do:
- Use actual sharp and flat signs
- Add interactivity to our component:
- Hover states should change the color
- We'll need click listeners for each segment
- Reflect selections back in the parent component
- Make the component more configurable from a styling perspective
- Break the component out of this project into a specific repo, so we can publish it!
In the next post in this series, we'll take a look at adding interactivity to the component. We'll add styling for hover over each segment, and click handlers for each segment so that we can use our component for its intended purpose as a selector for my Music Theory Dashboard app. That post will not be nearly as long as this one, but should still be fun!
Thanks again for reading, and see you next time!
Edit/correction: /u/ClarinetIsDumb from Reddit pointed out that my diminished chord for the key of G flat major was incorrect. I've updated this in the component's source code, and also in the final rendering of the SVG for this article. Thanks again to /u/ClarinetIsDumb for the correction!
Hey! Before you go - if you liked this post, consider signing up for my email list via Substack so you can get notified whenever I publish a new post!